Cast iron electrolysis

A little while ago, Benji was shopping at the Alameda Flea Market and came across a really neat rusty old waffle iron. The piece has a base that you can put over a small wood or charcoal fire. The iron itself is two separate pieces that sit on top of the base and hinge open and closed for cooking. You can flip the iron over by rotating it sideways inside the base. It’s a pretty nifty little piece of metalwork.
It was in awfully bad shape, and unusable without extensive cleaning. Just the thought of scrubbing it clean by hand made me tired. Ben looked around on-line and found a way to clean cast iron using electrolysis. We decided to give it a try!
We assembled the parts we were going to need. I bought a six-foot length of rebar and hacksawed it into 18" lengths to serve as anodes. We cut and stripped the ends of electrical wire to connect up to a manual battery charger to provide the needed juice. I got a box of washing soda for the solution. A big tub served as the vessel.

The wire we used was pretty low-gauge, so strong enough to suspend the pieces in the solution directly. We sanded the spots on the cast iron where we connected the wire to improve the conductance, but then we just wrapped the wire around those spots and squished it tight with pliers. We put a 2x2 board across the top of the tub to hang the pieces from. We put one anode in each corner and duct-taped them to the tub to keep them from falling over.

We put all three pieces in the solution at the same time. Electrolysis is a line-of-sight process — electrons flow between the pieces and the anodes, and each of the pieces cast a shadow that would impede electron flow to the others. But since we had them surrounded by anodes, we figured we might get pretty good coverage. We wanted to get them all clean in just one session to save ourselves time.
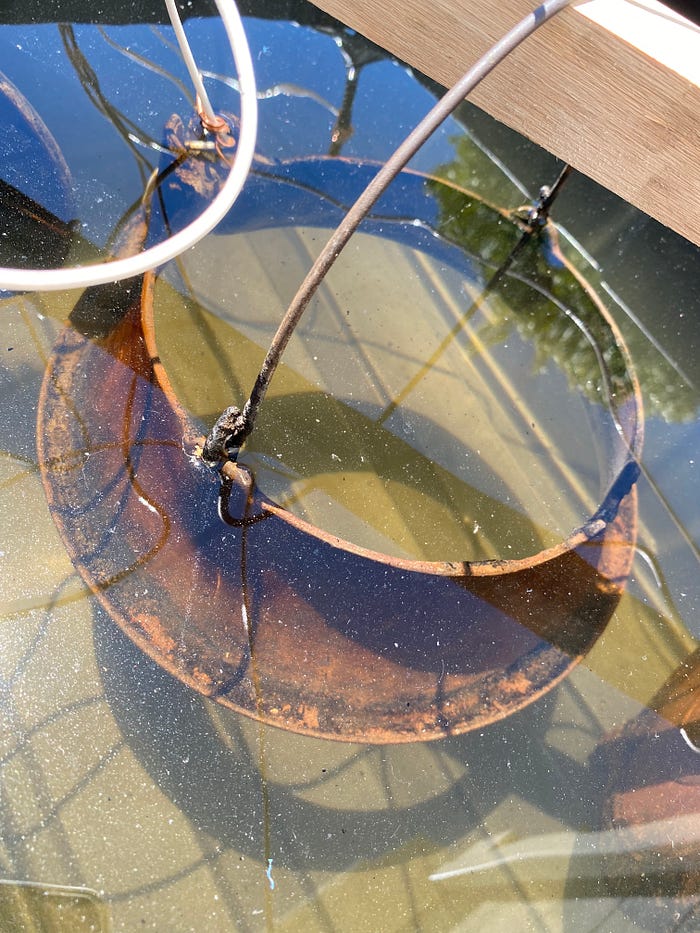
Here are the base and one of the waffle iron pieces suspended in the solution, just before we hooked up the battery charger:


We fiddled with the charger settings a bit. We got a really good bubbling reaction at twelve volts and ten amps. Once, one of the waffle irons rotated in the tub and touched the nearby anode, which shorted the whole thing out. Luckily the charger was smart enough just to shut down. I noticed that on one of my periodic checks, straightened the iron out and reset the charger.
We ran the thing for almost ten hours. Here’s a shot of the whole tub from above, a couple of hours in:

And a close-up of the surface around one of the anodes, near the end of the session:

By the end, the charger was still cranking out 12V but the current had dropped to around 2 amps. That was some combination of caking of the anode surfaces and consumption of the available ions in the soda bath. The bubbling was much reduced, and we figured we’d gotten about all the cleaning we were going to, so we disconnected the charger and pulled the pieces out.
They were already really cleaned up!

We took them inside, and Jennie and Benji washed the soda solution off and cleaned them up with soap and water. The waffle irons still had some residual carbon chunks scattered around their surfaces, but those were pretty loose and could be scraped off just with a wooden chopstick. When we got them clean, Benji did a quick job of seasoning them to keep the rust from coming back.
It looks really nice now!


Before we started, we could see that there was some lettering on the outside of the waffle irons, but it was too gunked up to read. Now you can see that the Wagner Manufacturing Company made it, and used a patent that was granted on February 22, 1910! We don’t know when the piece was made, but it had to be in that era.
Clean-up wasn’t too bad. I threw the nasty rebar out and poured the rusty soda solution down the toilet. We were careful to wash everything well with soap and water.
Benji tells me we’re having waffles for dinner tonight.
